

These instructions guide you through the first installation of Codenica On-Premise in your company infrastructure. They cover preparing Docker, downloading the correct package, placing the license file, starting the application, and preparing the addresses used by users and monitoring agents. If Codenica On-Premise is already installed and you want to load a newer version, use the system update instructions. The first installation starts exactly two containers: the Codenica application container and the PostgreSQL container.
Download the Codenica On-Premise First Installation Package
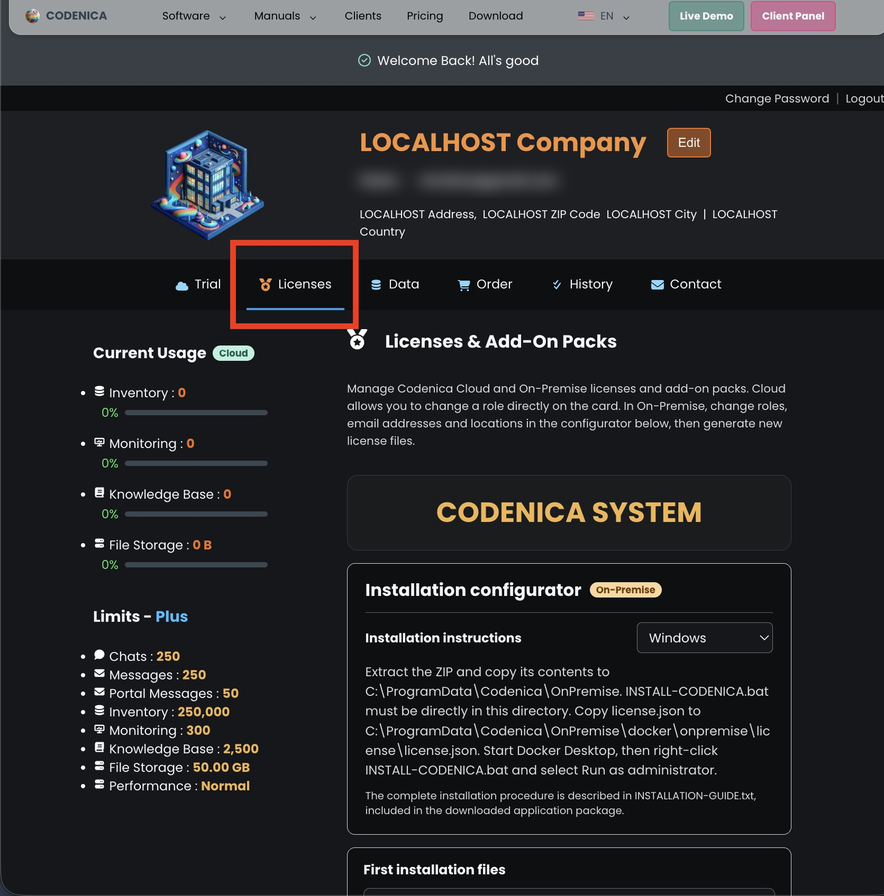
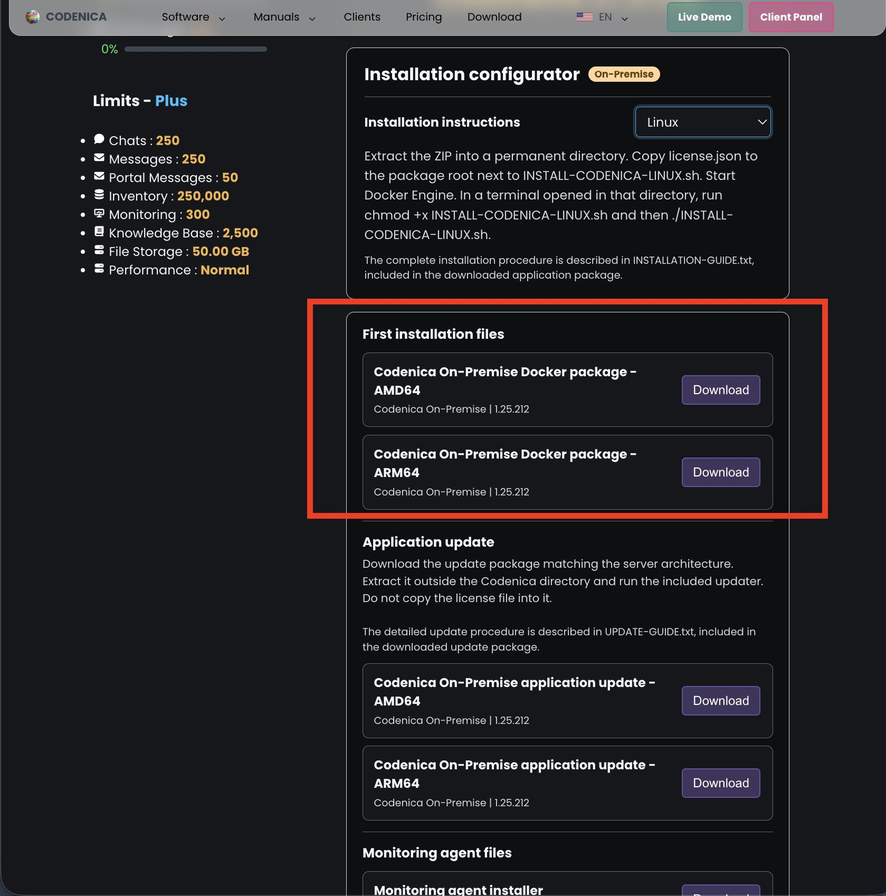
Sign in to the Codenica Customer Portal and open the Licenses tab. In the installation configurator, download the first installation package matching the host processor architecture. You can also prepare license files for individual installation locations there.
One Company, Several Installation Locations
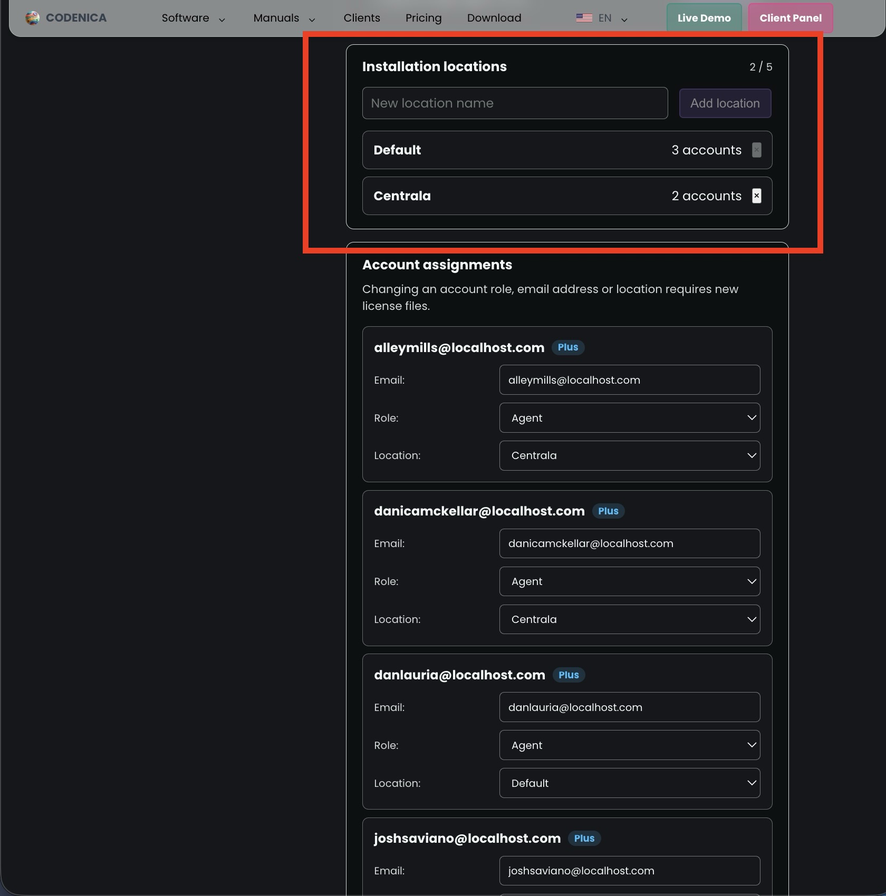
If you want to run the Codenica system in several branches, facilities, or other places, create a separate installation location for each one in the configurator. The configurator shows the maximum number of available locations. This number is based on the active paid licenses for accounts with the Administrator or Agent role. One location can have several accounts and selected add-on packs assigned to it.
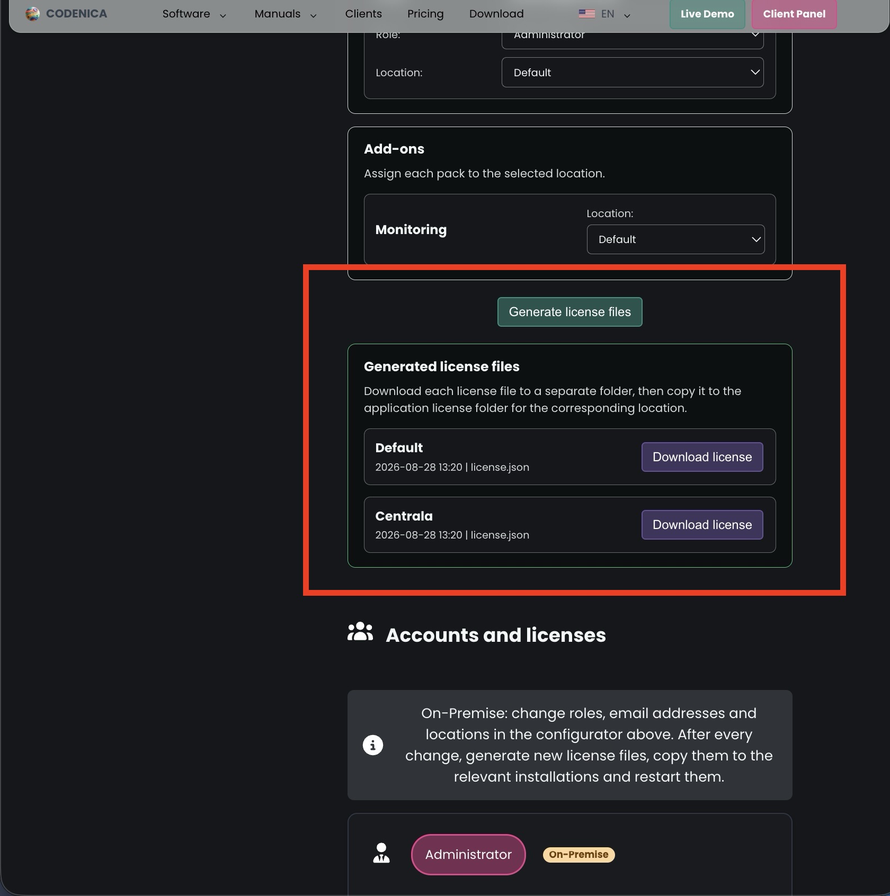
Assign accounts and add-on packs to the appropriate locations. Each location must have at least one account with the Administrator role. You can also set account roles in this configurator. Then select Generate license files. You will receive a separate license.json file for each location. Use each file only in the installation assigned to that location. The configurator does not create a separate application package for every place. Download one package for the required architecture, then download a separate license file for each location.
Run each installation on a separate host or in an isolated environment prepared by an administrator. The current installation packages assume one instance per host. They use fixed container names, port 5150, and one Codenica Discovery service, so do not run several unchanged packages on the same host.
Choose the correct architecture:
- amd64: standard 64-bit Intel or AMD computers, including Intel Macs;
- arm64: ARM64 computers, including Apple Silicon Macs and Windows on ARM64.
On Linux, x86_64 means amd64 and aarch64 means arm64. The installer rejects a package that does not match the computer architecture.
Install the Docker Environment
On Windows 10 or 11, install Docker Desktop for Windows. On macOS, use Docker Desktop for macOS. On Linux, install Docker Engine with the Docker Compose v2 plugin. Docker Desktop is not required on Linux.
Before installing, also review the current Docker Desktop license terms. The scope of free use depends, among other things, on the type and size of the organization.
Installation on Windows
- Extract the downloaded ZIP file. Do not run the installer directly from the ZIP preview.
- Create the permanent directory
C:\ProgramData\Codenica\OnPremise. - Open the extracted package folder and copy its contents into the directory above.
INSTALL-CODENICA.batmust be located directly atC:\ProgramData\Codenica\OnPremise\INSTALL-CODENICA.bat. - Copy the
license.jsonassigned to this location exactly toC:\ProgramData\Codenica\OnPremise\docker\onpremise\license\license.json. - Start Docker Desktop and wait until Docker Engine is ready. Docker Desktop must use Linux containers.
- Right-click
INSTALL-CODENICA.batand select Run as administrator. - Wait for
Installation completed successfully.. The installer loads the application and PostgreSQL images, creates durable secrets, starts both containers, configures the local firewall, and installs the Codenica Discovery program. Discovery is added to Windows Task Scheduler and starts automatically after a system restart.
Installation on Linux
- Extract the ZIP file into a permanent directory.
- Copy the
license.jsonassigned to this location to the root of the extracted package, next toINSTALL-CODENICA-LINUX.sh. The Linux installer copies it todocker/onpremise/license/license.jsonduring installation. A license already placed at the target path is also accepted, but do not keep two different license files. If both exist, the license in the package root is used. - Start Docker Engine and make sure Docker Compose v2 is installed.
- Open a terminal in the package directory and run:
chmod +x INSTALL-CODENICA-LINUX.sh
./INSTALL-CODENICA-LINUX.sh - Enter your sudo password when requested. The script checks the package, loads both Docker images, creates durable secrets, starts the Codenica system, installs the Codenica Discovery program as a systemd service, and configures UFW or firewalld if it detects an active firewall.
Installation on macOS
- Extract the ZIP file into a permanent directory.
- Copy the
license.jsonassigned to this location to the root of the extracted package, next toInstall-Codenica.command. The macOS installer copies the license todocker/onpremise/license/license.json. A license already placed at the target path is also accepted. Do not keep two different license files. - Start Docker Desktop and wait until Docker Engine is ready.
- Double-click
Install-Codenica.command. If macOS blocks the first launch, Control-click the file and select Open. - Enter your administrator password when requested. The installer starts the two containers and installs the Codenica Discovery program. On macOS, the program is added to
launchdas a service for the current user and starts automatically after login. Codenica Discovery announces the local system address ascodenica.localthrough mDNS.
Open the Codenica On-Premise System
After installation, Codenica On-Premise is ready to use. The default address is http://codenica.local:5150. The installer also displays a fallback address using the host LAN address, for example http://192.168.1.50:5150.
A separate Codenica Discovery program, started automatically by the host operating system, announces the codenica.local name. It is not a third container. Computers accessing the Codenica system must be connected to the same local network. Device isolation, guest Wi-Fi, a VPN, or company firewall rules may block local communication or mDNS.
If codenica.local does not work, use the LAN address displayed by the installer and check that TCP port 5150 and UDP port 5353 are allowed on the network. An organization can create its own local DNS record pointing to the Codenica host LAN address. A network administrator can also use a reverse proxy when a custom hostname, HTTPS, or another external port is needed.
Installation Configuration, Licenses, and Monitoring Agents
After the first installation, Codenica On-Premise is ready to use. In the application settings, under Menu > Settings > On-Premise, you can configure your own PostgreSQL server, the application address used by browsers and users, and the address used by monitoring agents. Save each change, then stop and start the application in Docker Desktop by selecting STOP followed by START, because the values are read when the application starts.
If you want to change the application address, determine the final address before installing agents. The agent initiates communication, so changing the address later requires reinstalling or reconfiguring the agents. In a network completely disconnected from the internet, keep the agent address the same as the application address.
In a network completely disconnected from the internet, download the agent installers from the Codenica Customer Portal and copy the complete set to docker/onpremise/agent-updates/stable/win-x64/. The set must contain files from the same version: latest.json, codenica-insight-agent-installer.exe, and codenica-insight-agent-update-win-x64.zip. Do not rename the files, edit the manifest, or mix files from different versions. Monitored computers will download new agent versions from the local Codenica installation.
Important Operating Information
The installation starts exactly two containers: the Codenica application and PostgreSQL. The Codenica Discovery program runs outside the containers as a service of the host operating system. Only HTTP port 5150 is published on the local network.
Do not delete or move the package directory after installation. The installer and Docker use its files and subdirectories containing configuration, durable secrets, user files, backups, logs, certificates, and application data. Create regular backups of the Codenica system data and PostgreSQL data. Do not share license.json, secrets.env, certificates, or Data Protection keys.
Windows logs: C:\ProgramData\Codenica\Logs\install.log and C:\ProgramData\Codenica\Logs\discovery.log. Linux logs: <package-directory>/install.log and /var/log/codenica/discovery.log. macOS logs: <package-directory>/install.log and ~/Library/Logs/Codenica/discovery.log.